Growing with Children
Growing Potatoes in Containers
Grow potatoes in bags, buckets and pots: choosing seed potatoes, earthing up, watering, and the day children tip out the bag to find the crop.
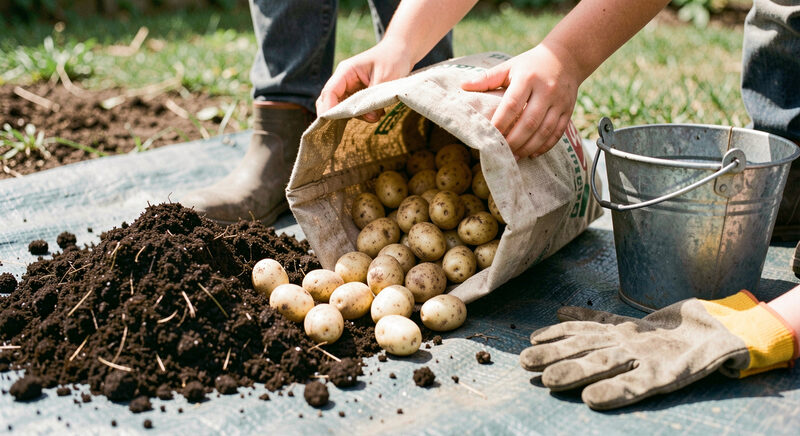
Potatoes are the crop that turns a container into a small event. The plant grows above ground for weeks and then, at the end, a child tips the whole bag onto a sheet and finds the crop underneath. Nothing else in a family garden delivers that moment. This guide covers the seed potatoes to buy, the bags and buckets that work, how to earth up the stems, and when to lift the harvest.
What a seed potato is
A seed potato is a small potato grown for planting rather than eating. It is not the same as a supermarket potato, which may carry disease and is often treated to stop it sprouting. Buy certified seed potatoes from a garden centre or a seed supplier, and choose an early variety if the aim is a quick crop: first earlies are ready in about ten to twelve weeks, maincrops take longer and store better. A child can help lay the seed potatoes out in a tray in a cool, light place for a few weeks before planting, so they grow short green shoots, a step called chitting.
Choosing the container
A fabric grow bag is the simplest option. It drains well, it is light enough to move, and it can be emptied by tipping. A ten to fifteen litre bag suits one or two seed potatoes; a larger bag or a half barrel suits three or four. A strong bucket works too, provided holes are drilled in the base and lower sides. Whatever the container, it needs drainage and it needs to be deep, because potatoes form along the buried stem, and more buried stem means more potatoes.
Put the bag or bucket in a sunny spot. Potatoes want full sun and steady moisture, and a container in shade will produce a poor crop. A patio, a doorstep or a corner of a yard all work as long as the light is good.
Planting and earthing up
Fill the container about a third full with compost, place the seed potatoes on top with the shoots facing up, and cover them with about ten centimetres of compost. Water gently. As the stems grow, add more compost around them every couple of weeks, burying about half the new growth each time, until the container is full. This is called earthing up, and it is the step that decides the size of the harvest. Children enjoy it, because it looks as if the plant is being buried and then reappears taller a week later.
Keep the compost moist but not soaked. In warm weather a bag may need water every day. A mulch of grass clippings over the surface slows drying and keeps the tubers dark, which matters because light turns potatoes green and green potatoes should not be eaten.
Which varieties to choose
Potato varieties are grouped by how long they take. First earlies are lifted in about ten to twelve weeks and give small, waxy new potatoes that are best eaten fresh. Second earlies take a few weeks longer and give a slightly larger crop. Maincrops take the longest, around twenty weeks, and produce the bigger, floury potatoes that store well through winter. For a family garden with children, first earlies are the best place to start, because the wait is short and the reward is quick. A named variety such as a red skinned early or a yellow fleshed salad type adds interest, and children often prefer the coloured ones.
It is worth growing two varieties in two bags, one early and one maincrop, so the family has new potatoes in early summer and a storing crop in autumn. Label each bag with the variety and the planting date, using one of the markers described in the guide to painting clay pots and making plant markers, so the harvest is not a mystery when the bags are tipped out.
Feeding and problems
Potatoes in a container do not need much feeding if the compost was fresh, but a liquid feed high in potash once the plants begin to flower helps the tubers swell. Avoid a feed high in nitrogen, which grows leaves at the expense of the crop. The main problems are dryness, which splits the tubers, and blight, a disease that blackens the leaves in warm, wet weather. If blight appears, cut the tops off and lift the crop after a fortnight, rather than leaving the tubers to rot.
Slugs can damage potatoes in a bag, especially in a wet season. The guide to organic slug control covers barriers and traps that do not rely on pellets, which is the safer choice in a garden used by children.
When to harvest
New potatoes can be taken from about ten weeks, when the plants are still flowering, by feeling in the compost for a few tubers and leaving the rest to grow on. The main crop is ready once the leaves have yellowed and died back, usually two to three weeks after flowering ends. Stop watering for the last fortnight so the skins set. Then tip the whole container onto a sheet and let the children find the potatoes. It is worth doing this on a dry day and with a bucket to hand.
What to do with the crop
New potatoes are best eaten the day they are lifted, boiled and buttered, and they are the most convincing argument a garden can make to a child who is not sure about vegetables. A larger crop can be stored in a cool, dark place in a paper sack, not a plastic bag, and checked now and then for soft ones. Save the smallest, cleanest tubers if you want to grow the same variety next year, though certified seed is safer against disease.
Once the bag is empty, tip the compost onto a bed or into another container, wash the bag and store it dry. The bag will last several seasons, and reusing it keeps the whole project cheap. The wider hub on growing with children shows how a potato bag fits into a small garden plan alongside pots, a raised bed and a windowsill of seedlings.