Garden Play and Crafts
Miniature Gardens
Make a miniature garden with children: choosing a shallow container, soil, small plants and tiny props, and keeping a fairy or dinosaur scene alive outdoors.
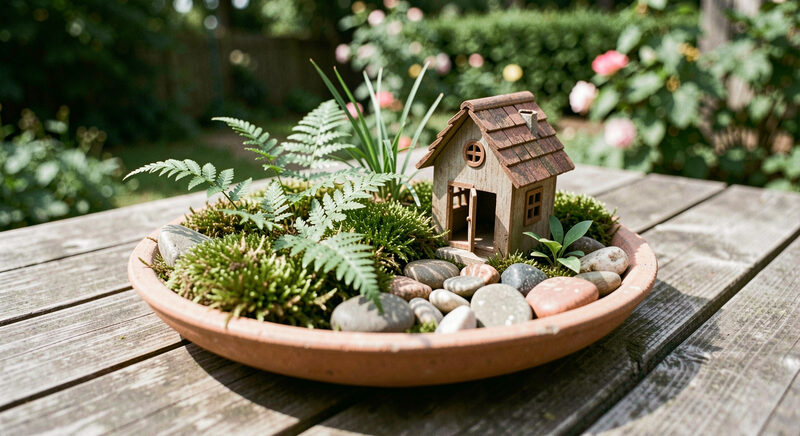
A miniature garden is a small world in a shallow dish, and it is one of the few garden projects a child can carry indoors, put on a shelf and keep. It suits a wet afternoon, a birthday party or a quiet hour, and it teaches the same things a full size bed teaches, only on a scale a child can hold: soil, drainage, light, watering and the slow business of keeping something alive.
Choosing the container
The best container is wide and shallow, with a hole or two in the base. A plant saucer, an old baking tray, a shallow bowl, a wooden box or a broken pot all work. Avoid anything without drainage unless the planting is of succulents and watering is kept very light, because a miniature garden that sits in water will rot. Give the container a saucer or a tile underneath to protect the shelf or table.
Size sets the scale. A dish thirty centimetres across can hold a path, a pond, a tiny house and a few plants. A smaller dish needs a simpler scene. Decide the scale before planting: a toy figure that is five centimetres tall sets a different world from one that is two, and mixing scales is what makes a miniature garden look muddled rather than magical.
Soil and drainage
Fill the container with a light potting compost, leaving a couple of centimetres below the rim. On top of the compost, before planting, it helps to build the landform: a small mound for a hill, a hollow lined with a piece of pond liner or a foil dish for a pond, a scatter of fine gravel for a path. Children take to this part quickly, because it is play with soil. Keep the landform gentle, so the plants are not left perched on a slope that dries out.
Plants that stay small
The plants do the hard work of making the scene believable. Choose species that stay compact and tolerate the close conditions of a dish. Good choices include small sedums and other succulents, tiny ferns, moss, miniature ivy, small leaved thyme, and slow growing alpines. A single small conifer makes a tree; a clump of moss makes a lawn; a few pebbles make a rock outcrop. Avoid anything that will outgrow the dish within a month, and check whether each plant likes sun or shade before grouping them.
Children often want to add a flowering plant. A small viola or a tiny bulb can work, but a plant that will grow tall and flop should be left for a bigger container. The aim is a scene that looks the same in three weeks as it did on the day it was made, which is a lesson in choosing plants for the place rather than for the moment.
Props and decoration
The props are where a child's imagination shows. Small toys, a house, a fence made from lolly sticks, a path of gravel, a pond of foil or a bottle cap, a bench, a washing line of thread: all of these turn a dish of plants into a place. Keep the props weatherproof if the garden is to live outdoors, and fix anything light so the wind does not rearrange the scene. Avoid sharp edges and anything small enough for a toddler to swallow, and keep the miniature garden out of reach of very young children.
A theme for the scene
A theme gives a miniature garden a shape and gives a child something to plan towards. A woodland scene uses moss, small ferns, bark and a scatter of tiny mushrooms. A desert scene uses succulents, gravel and a few stones, and needs very little water. A farm scene uses a small building, a fence and a patch of trimmed grass. A seaside scene uses sand, pebbles and a foil pond for the sea. The theme decides the plants, the props and the scale, and it turns a dish of soil into a place with a story.
Let the child choose the theme and gather the props before planting. A shoe box of collected pebbles, twigs and small toys is enough to start. Keep a few spare props in a tin so the scene can be changed when a new idea arrives, and photograph the finished garden so the child has a record before it grows over.
Watering and light
A shallow container dries quickly, so check the compost every day or two with a finger. Water gently with a small can or a spray bottle, and stop as soon as water appears in the saucer. A miniature garden in full sun will need more water than one in light shade. Rotate the dish now and then so the plants grow evenly towards the light, and remove any dead leaves before they rot.
If the garden lives indoors, put it where it gets bright light but not harsh midday sun through glass, which can scorch small leaves. A windowsill that faces east or west suits most miniature plants; a south facing sill in summer may be too hot.
Keeping it going and changing it
Part of the pleasure is that a miniature garden can be remade. When a plant outgrows the dish, lift it and replace it with something smaller. When the scene becomes stale, change the props and rearrange the paths. A child who has made three or four versions of the same garden has learned that a garden is never finished, only tended.
If a plant dies, that is a lesson rather than a failure: the compost was too dry, the light was wrong, or the plant was too big for the dish. The wider hub on garden play and crafts sets this project beside other things to make in a family garden, from a bean teepee to painted pots.